Start with a Solid Foundation
Before you even crack open a tube of paint, the surface you’re working on needs to be ready to handle everything you plan to throw at it. Whether you’re using stretched canvas, wood panel, or rigid board, priming is non negotiable. It seals the surface, prevents oil from seeping through, and creates the right amount of tooth for your brush to catch. Store bought pre primed canvases will do, but if you want more control, apply your own gesso two or three coats, sand in between, and you’re off to a better start.
Next, think about ground color. Starting with a pure white surface is fine, but it’s not always ideal. A toned ground gives you instant mid tone depth and makes it easier to judge values as you paint. Warm ochres or cool grays are popular starting points subtle, neutral, and flexible.
Finally, map out your composition. Light sketching with charcoal or a diluted paint wash helps set your intentions without locking you in. This underdrawing should guide your first pass, not dictate every move. Keep it loose, and stay ready to adapt.
Thin to Thick The Golden Rule
One of the oldest rules in oil painting still stands: fat over lean. It’s simple physics and chemistry. Paints mixed with more oil (fat) dry slower. Layers with less oil (lean) dry faster. If you reverse that order putting faster drying layers on top of slower ones you risk cracking as the bottom pulls tight while the top’s still curing.
Start lean. Your first layers should be thinned out with a solvent like turpentine or Gamsol. These early passes are about establishing structure, tone, and temperature, not locking in texture or detail. They dry fast, setting the pace for everything that follows.
As your painting progresses, go fat. Add a bit more linseed or walnut oil with each pass. This makes the paint glide better, builds luster, and ensures each new layer dries at a slower, more stable rate. By the time you’re into highlights and finishing strokes, the mixture should be rich and supple a sign you’ve set up your painting to last.
Block in Values Before Details
Start with darks and midtones. Don’t worry about perfection yet this is about shaping the bones of your painting. Massing in these foundational values gives form and depth right out of the gate. It sets your stage so that lighter tones and highlights have something to push against.
Use stiff bristle brushes. They hold more paint and deliver direct coverage without fuss. This isn’t the time for finesse your goal is to cover surface and establish shapes fast, not to get caught in the weeds of detail.
At this stage, keep edges loose. Let things blur and bleed a bit. The crisp lines and focal points will come later during refinement. Blocking in is about gesture and structure. It’s your first swing and it shouldn’t look finished. It should feel alive.
Get this phase right, and the rest of your layers have direction and weight.
Building Volume with Impasto
Once your underpainting is locked in and values are solid, it’s time to build volume. This is where texture steps into the spotlight. Middle and upper layers are your chance to go thicker brushwork turns sculptural, and each stroke starts carrying physical weight.
Use a palette knife when you want something bold and three dimensional. It’s great for slabs of paint that catch the light and exaggerate form. A stiff brush, on the other hand, gives you more control over ridges and allows you to sculpt subtly, especially in portraits or tighter passages.
Mediums like cold wax, impasto gel, or even stand oil can give your paint extra body without messing with color too much. They let you pile it on. Just remember: every textured layer should have intent. Volume isn’t for decoration it should help define structure, emotion, or the light itself.
This is where painting becomes less about illusion and more about presence. Let the paint stand up for itself.
Glazing, Scumbling, and Optical Blending
Layering techniques like glazing and scumbling can take a painting from flat to luminous but only when done with purpose. These effects rely on transparency, contrast, and control, demanding as much restraint as they do creativity.
The Power of Transparent Glazes
Transparent glazes let light pass through upper layers to reflect off the paint beneath, creating a glowing, layered effect that adds depth and subtlety. To glaze effectively:
Choose transparent pigments (like alizarin crimson, ultramarine blue, or phthalo green)
Mix with a medium like linseed oil or glazing liquid for a smooth film
Apply in thin, even strokes using a soft brush on a fully dry surface
Layer gradually to intensify color without overpowering the underpainting
Use glazing to:
Deepen shadows
Enhance color temperature
Create transitions in atmospheric perspective
Scumbling: Texture with a Whisper
Unlike glazing, scumbling involves dragging a semi opaque paint layer over a dry, textured surface. This allows lower layers to peek through, creating a soft, broken texture ideal for highlights or atmospheric touches.
To scumble effectively:
Load a dry, stiff brush with thicker, light value paint
Use light pressure to skim over texture rather than pressing into the surface
Avoid overworking this is about suggestion, not coverage
Scumbling is especially useful for:
Adding glow to clouds, water, or foliage
Softening hard edges
Creating a sense of light catching texture
Layering Without Mud
Glazing and scumbling can both lose their charm when misapplied. Here’s how to prevent muddy color and maintain clarity:
Always ensure layers are dry before applying more touch dry isn’t always enough for glaze stability
Avoid overblending; let brushstrokes and texture breathe
Use clean brushes for clean results residue from earlier hues can dull your colors
Work with intention: ask what each layer is meant to achieve before applying it
By mastering these optical techniques, you can add complexity and luminosity to your oil painting without piling on unnecessary weight. The key is restraint let your layers do the talking, one whisper thin glaze or broken stroke at a time.
Timing Between Layers
Oil painting demands patience. Drying time isn’t something you rush it’s a tool to be used as strategically as a brush or knife. Each layer needs space to settle, and clarity comes when you give pigment time to bind properly before adding more. Rushing it muddies the colors and wrecks adhesion. Pacing matters.
Know the difference between touch dry and fully cured. A surface might feel dry in a day or two, but underneath, it’s still shifting. Touch dry means you can lay on a glaze or do gentle scumbling. But if you’re planning to go in heavy with new paint or texture, wait until it’s cured which can take weeks. The bottom line: don’t dive back in just because it feels dry. Feel isn’t always fact.
If you’re working on multiple pieces, stagger them. Having two or three paintings in progress means you’re always in motion without pushing wet layers too soon. While one rests, another moves to the next step. It’s a quiet rhythm that keeps a studio humming and the work from getting wrecked by impatience.
Texture as Storytelling
Surface texture isn’t just technique it’s messaging. Buildup on the canvas pulls the viewer in, anchoring their attention to moments that matter. Thick, sculpted strokes can stop people mid step; they signal focus, emotion, tension. Whether it’s the peak of a mountain, the light on a cheekbone, or the edge of a rusted tool texture tells a story loud and clear.
But power lives in restraint too. Not everything should shout. Keeping smoother, flatter passages lets the eye breathe, gives contrast, and sets up dynamic reveals. Place your quiet next to your bold make the viewer lean in and out as they explore the painting.
Composite layers bring it home. Think about how each level glaze, impasto, scumble adds meaning, not just mass. Up close, the work should still speak. A soft haze over a sharp ridge says more than either could alone. Texture can whisper, scream, and everything in between. Use it like language.
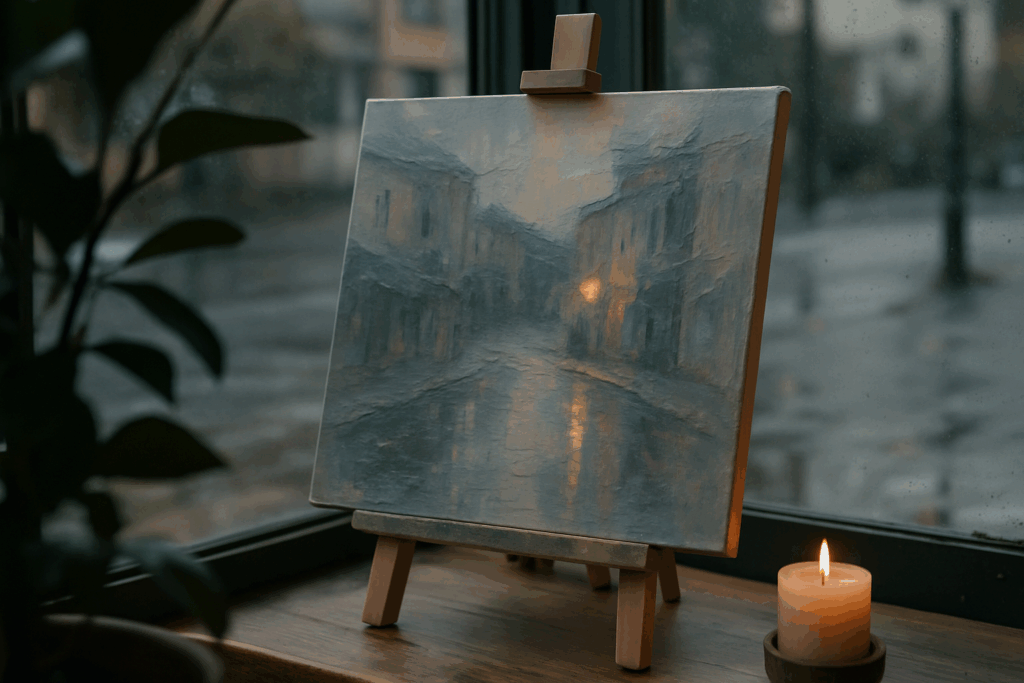
See It in Action
If you want to get a real world sense of how layered oil painting techniques come to life, the layered painting gallery is a solid place to start. These aren’t just pretty pictures they’re studies in how texture amplifies both form and emotion. From subtle glazing to heavy impasto ridges, you’ll see how different artists push physicality in their work.
Take time to zoom in and observe how layers are stacked or scraped back. Notice how some painters favor a slow build up with smooth transitions, while others go bold with scraping knives and thick medium additions. Everyone has a fingerprint, and layering is often where it shows.
Use the gallery as an idea vault: how you mix brush technique with palette knife, where to go soft vs. bold, when to stop layering. Let it feed your next studio experiment, not copy it. Inspiration’s not hard to find, you just need to look closely.
 Zyphren Kryndall is the kind of writer who genuinely cannot publish something without checking it twice. Maybe three times. They came to inspiration and resources through years of hands-on work rather than theory, which means the things they writes about — Inspiration and Resources, Creative Techniques and Tutorials, Gallery Exhibitions and Reviews, among other areas — are things they has actually tested, questioned, and revised opinions on more than once.
That shows in the work. Zyphren's pieces tend to go a level deeper than most. Not in a way that becomes unreadable, but in a way that makes you realize you'd been missing something important. They has a habit of finding the detail that everybody else glosses over and making it the center of the story — which sounds simple, but takes a rare combination of curiosity and patience to pull off consistently. The writing never feels rushed. It feels like someone who sat with the subject long enough to actually understand it.
Outside of specific topics, what Zyphren cares about most is whether the reader walks away with something useful. Not impressed. Not entertained. Useful. That's a harder bar to clear than it sounds, and they clears it more often than not — which is why readers tend to remember Zyphren's articles long after they've forgotten the headline.
Zyphren Kryndall is the kind of writer who genuinely cannot publish something without checking it twice. Maybe three times. They came to inspiration and resources through years of hands-on work rather than theory, which means the things they writes about — Inspiration and Resources, Creative Techniques and Tutorials, Gallery Exhibitions and Reviews, among other areas — are things they has actually tested, questioned, and revised opinions on more than once.
That shows in the work. Zyphren's pieces tend to go a level deeper than most. Not in a way that becomes unreadable, but in a way that makes you realize you'd been missing something important. They has a habit of finding the detail that everybody else glosses over and making it the center of the story — which sounds simple, but takes a rare combination of curiosity and patience to pull off consistently. The writing never feels rushed. It feels like someone who sat with the subject long enough to actually understand it.
Outside of specific topics, what Zyphren cares about most is whether the reader walks away with something useful. Not impressed. Not entertained. Useful. That's a harder bar to clear than it sounds, and they clears it more often than not — which is why readers tend to remember Zyphren's articles long after they've forgotten the headline.